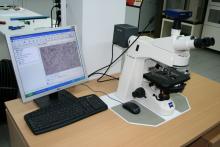
The strict specifications that Interplast conforms to in the production of ATLAS-PLUS pipes and fittings are certified in its proprietary state-of-the-art laboratories by experienced scientific personnel, according to tests prescribed by the European Norm EN 1451.
The production batch release order is given only after successful results are obtained with the following test procedures:
It refers to a regular check that is carried out on every receipt of raw material. The consistency of the material's specifications according to the supplier is ascertained, while at the same time the agreement of its rheology with the specifications of the standards is verified, which is directly related to the appropriate extrusion temperature profile and consequently to the correct treatment and proper homogenization of the material.
It concerns measurements of outside diameter, wall thickness and ovality of pipes and fittings, as well as rubber rings, by calibrated instruments. All Interplast metric instruments are German and Japanese made and are distinguished by their high measurement accuracy.
Essentially, these are controls that verify and certify the continuous measurements carried out during production.
The small deviation of the flow index of the material of the pipe and fittings from the flow index of the raw material used in their manufacture translates into excellent processing of the material during production. This presupposes the observance of ideal parameters in the extrusion, such as temperature profile, pressure, cooling, screw revolutions, production speed, etc. The deviation according to the specifications must not exceed 20%. ATLAS-PLUS pipes and fittings have a flow index deviation of up to 5%, which indicates their excellent manufacturing quality.
It concerns one of the most important quality controls and is carried out in accordance with the specifications of the International Standard ISO 18553. The full compliance of the ATLAS-PLUS pipe material with the specifications of the standard translates into assurance of the resistance of the pipes under any adverse conditions and maximum reliability against its practically unlimited service life due to the absence of defects in the material structure of pipes and fittings.
Samples from each production batch remain in a laboratory oven at 150oC for 60min (1h) and after cooling to 23oC their % reduced shrinkage is measured - (initial measurement – final measurement) / (initial measurement) x 100).
The measurement results must not exceed 2.0% according to the specifications. ATLAS-PLUS tubes show results of 0.5%, which is 75% lower than the requirement of the standard. This translates into the certainty of using high quality raw material and excellent processing of the material, as well as particularly low thermal linear expansions of the pipes during their operation with high temperature internal flows.
The impact testing device using a falling weight (according to the EN 1451 standard), is state-of-the-art and consists of the throwing tower and a variety of calibrated balls of various weights. The test procedure and the impact speed are prescribed by the EN 744 standard.
The pipes shall respond without breaking or cracking under the appropriate test conditions (at a temperature of 23oC according to the standard) after application of an impact caused by a falling weight (bullet). The drop height and the weight of the ball during the test are proportional to the outside diameter of the tube.
Atlas-Plus tubes far exceed the requirements of the standard, demonstrating mechanical resistance to impacts of heavier balls from greater heights than those prescribed by the standard, but mainly in ambient temperatures well below 23oC, which are in the order of 5 degrees below zero (-5oC).
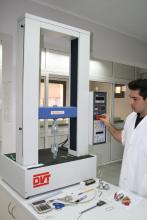
Strength tests are carried out in a tensile device and determination of the modulus of elasticity and elongation of the material, on samples of pipes and fittings properly prepared by a special device. All results are recorded on a computer, where the measurements are analyzed with the help of special charts.


